Remote control of lasers and receivers with an Android device.
The functionality of the GEO-Laser Remote App has been expanded continuously since its release in October 2016. It mirrors both the display and function keys for remote control of our lasers. The laser is therefore fully remote-controllable and operable. Changes in the laser are shown in the app immediately. When used in conjunction with one of our LE-71 or LE-72 laser receivers, the app can be used as remote display with numerous functionalities. For example, single measurements or continuous measurements can be carried out at any time intervals and stored automatically, or internally stored measured values can be read out. Find out more.
This article explains the individual functions step by step and helps you to use them. Further information can be found in the manual for the GEO-Laser Remote App.

Step-by-step instructions
1. Establishing a connection
After launching the app, you can choose between connection to one of our laser devices or a laser receiver. You can find out which devices are compatible on the product page . Simply click on the corresponding symbol.
Setting up a connection to a laser
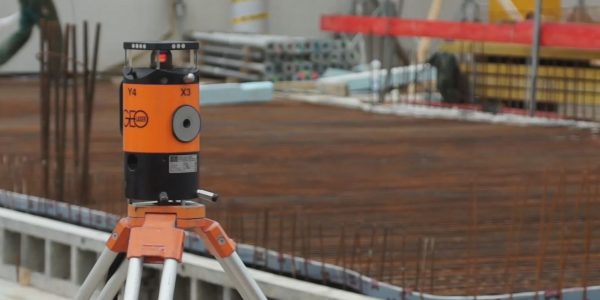
First, the laser device must be prepared for the wireless connection. To do this, press and hold the Menu button for about 6 seconds. Use the arrow keys to navigate to the menu item “K”. Then activate the wireless connection by pressing the down arrow button. To establish a connection between smartphone/tablet and laser, you must enter the MAC address of the laser in the app. To display it on the laser, press and hold the Menu button for about 6 seconds and navigate to the menu item “S” with the arrow buttons. Press the up arrow button to open the “Service Mode” menu. Then press and hold the up arrow button until code 22 appears in the display. Confirm this with OK.
In the app, select a connection with a laser from the start screen. Then open the context menu in the upper right corner and click on the entry “Enter MAC address”. The app then connects automatically to the laser. Under the menu items “Save device” and “Saved devices” you can save your lasers with any name and quickly re-connect to them later without having to enter the Mac address again.


Setting up a connection to a receiver
To establish a connection to a laser receiver, it must be in a Bluetooth mode. Switch on the receiver as usual and navigate to “Continuous measurement + BT” in the main menu. Confirm the action by pressing the “OK” button..
In the app, select a connection with a receiver from the start screen. Then open the context menu in the top right corner of the screen. Tap on the menu item “Select receiver”. Press the button “Add device” to open the Bluetooth setting of your smartphone/tablet. It can vary slightly from device to device. Start the Bluetooth search to find the receiver and pair the two devices. Enter the corresponding device pin (default: 1234). Once the smartphone and laser receiver have been paired, you can return to the GEO-Laser Remote App. Simply press the “Back” button on your smartphone/tablet. If you have already paired devices, they appear in the list under the menu item “Select receiver”.
2. Functions with a laser
If the app is used in conjunction with a laser device, it duplicates both the function keys and the laser display. The app thus serves as remote control and remote display of the operating states. The range of the connection may vary depending on the device and environment.

3. Functions with a receiver
Use of the app in conjunction with a laser receiver offers many different functionalities. For example, the smartphone can be used as a simple remote display with monitoring of limit values or also for measurement. The receivers LE-72, with a resolution of 1/10 mm, and LE-71, with a resolution of 1/100 mm, are compatible.
The GEO-Laser Remote App supports three measurement modes when connected to a laser receiver: Remote Display, Single Measurement and Continuous Measurement.
Remote display
In Remote Display measurement mode, the app displays the current measured value. It is shown as a large numerical value in the middle of the display as well as in the bar chart. In addition, limit values can be defined via the settings. If they are exceeded, the bar in the diagram turns red.
Single measurement
Like Remote Display, Single Measurement delivers the current measured value ongoingly. In addition, individual values can be saved at the push of a button in this mode and later exported as a .csv file. The last recorded measured value is displayed below the main display. It can be deleted by tapping it.
The .csv file can be found in the download folder of the device used and then opened in a spreadsheet program (e.g. Microsoft Excel). This allows further analysis of the measured values at a later stage. Please note: The logged measured values are only saved if you export the measurement series, otherwise the data will be lost when you exit the application.
Continuous measurement
If the app is in Continuous Measurement mode (or Interval Measurement), the current measured value is displayed in large numbers as before. In addition, a measured value is logged in the background at a predefined interval. The interval can be changed in the settings under “Measurement interval” and is displayed underneath the control panel (right) during the measurement. The last two logged measurements are displayed underneath the main display.
There are two ways to exit the measurement mode. Firstly, the measurement can be cancelled with the “X” button, and secondly, a .csv file can be generated and saved using the export button. You can find it in the download folder of your smartphone/tablet.


In addition, you have the possibility to read out the internal receiver memory and to export the existing measured values also as a .csv file. You can also use the app’s settings menu to set the factory zero point or transfer the time from the smartphone to the receiver. It is recommended to synchronise the time of the receiver as the time stamps of the measured values are generated with it. The factory zero point and the displayed unit of the receiver (inch/mm) can also be changed via the settings.
Recommended products
")
Universal-Laser UL-89L

Laser-Empfänger LE-71